





What is Sale Event
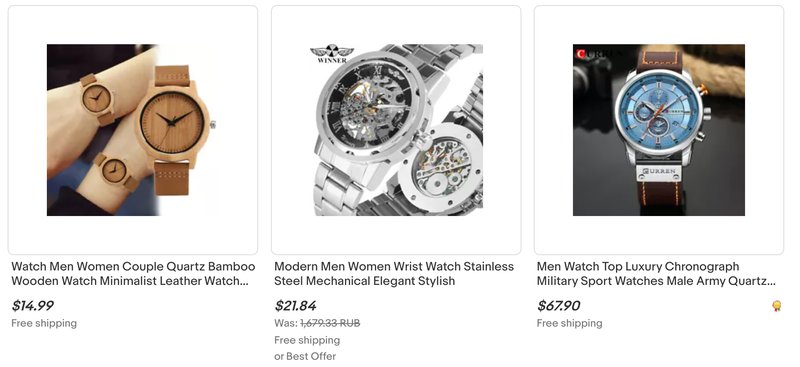
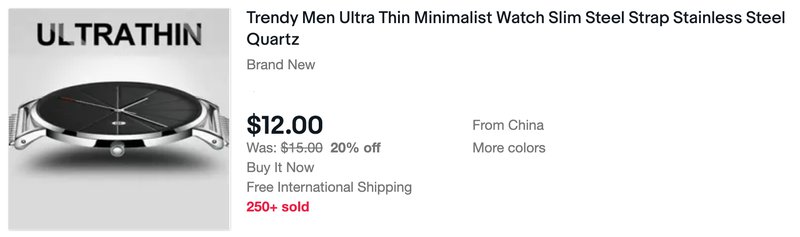
Sale Event is a great way to show your potential buyers the value of buying your items. As part of the discount, you select a specific group or category of items and discount them.
In this case, the conversion increases due to the fact that the product that has the old price and the discounted price is more attractive to a buyer (compared to the simple price reduction, without specifying the two prices.)
How to create a Sale Event
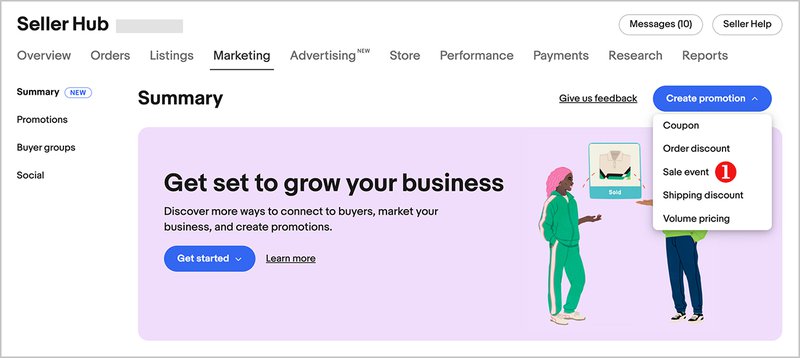
Step 1: Navigate to the Marketing tab
- Go to the Seller Hub and click on the Marketing tab
- Under the Create discount button, select Sale Event from the dropdown menu
Step 2: Set the Discount Type
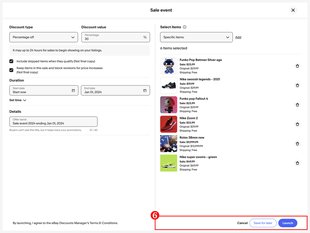
- You will be directed to the first page of the Sale Event setup
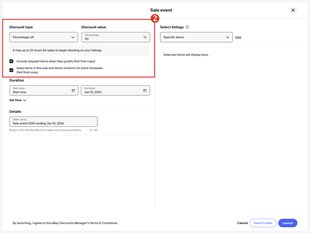
- In the Discount Type section:
- Choose the type of discount from the dropdown (e.g., "Percentage Off," "Amount Off," or "Sale Event Only")
- Enter the discount value in the appropriate box
- Ensure your values are within the allowed range (e.g., 5%-80% for Percentage Off) to avoid errors
- Additional options may include:
- Checkbox for including skipped items when they become eligible in the future
- Checkbox to keep items in the sale and block price revisions
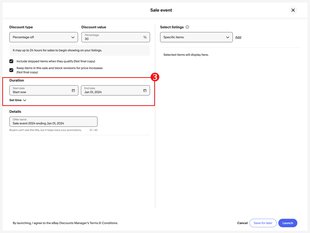
Step 3: Set the Sale Event Duration
- In the Duration section:
- Select the start and end dates for your Sale Event using the calendar feature
- The default start date will be set to Start Now, and the default end date will be 30 days from the start date
- You can customize the time for the discount by expanding the Customize time section, selecting start and end times in increments of 1 hour
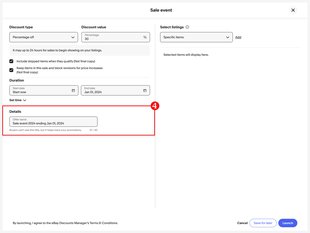
Step 4: Add details to the Sale Event
- In the Details section:
- The Offer Name field will be pre-filled based on existing logic, but you can modify the name to your preference
- Ensure the offer name does not exceed the character limit (typically 52-90 characters based on the tool you are using)
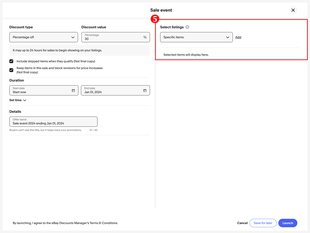
Step 5: Select Inventory
- In the Inventory Selection section:
- Choose which inventory to include in the sale. You can select from:
- All inventory
- Specific eBay categories
- Specific store categories
- Specific items
- The default selection will be Specific items for Sale Events
- Click the Add link to select specific items. This will open an L2 page where you can:
- Select individual items
- Use filters like price range, item condition, and categories to refine your selection
- Use a search feature to find specific items by title, SKU, or item ID
- After selecting items, they will appear on the main Sale Event page
- Choose which inventory to include in the sale. You can select from:
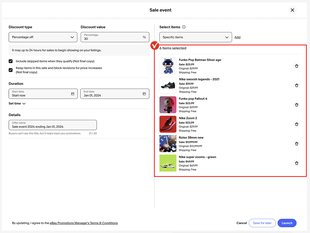
Step 6: Review and Launch the Sale Event
- After setting up the discount, duration, details, and inventory, review all settings
- Use the options at the bottom right of the page:
- Cancel will close the page and take you back to the discounts page
- Save for Later will save a draft of your Sale Event
- Launch will activate the Sale Event (note: the launch button will be grayed out until inventory selection is complete)
Step 7: Post-Launch
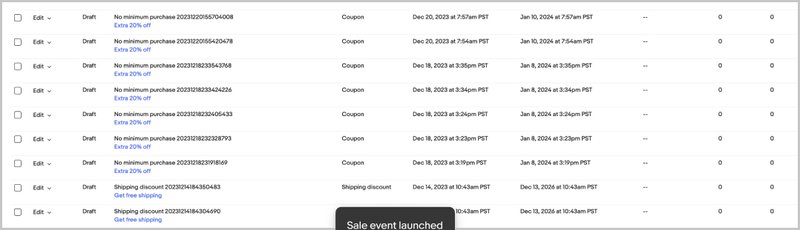
- Once your Sale Event is successfully created, you will see a confirmation message (toast) on the screen. This will auto-dismiss after 6 seconds
- Your discount will be live, and you can monitor its performance from the Discounts page under the Marketing tab in the Seller Hub
How to create and edit an Item-based Sale Event
Creating an Item-based Sale Event
Editing an Item-based Sale Event
How to create and edit a Sale Event by uploading item IDs
Creating a Sale Event by uploading item IDs
Editing a Sale Event by uploading item IDs
How to create and edit a SKU-based Sale Event
Creating a SKU-based Sale Event
Editing a SKU-based Sale Event
How to create and edit a Category-based Sale Event
Creating a Category-based Sale Event
Editing a Category-based Sale Event
How to create and edit an All inventory-based Sale Event
Creating an All inventory-based Sale Event
Editing an All inventory-based Sale Event
Tips
Do not run sales events for the entire store. It is much more efficient to launch discount for specific categories, brands, and thematic item groups. Otherwise, buyers will see too many items and may quickly lose their interest.
For items with a lower price, choose a percentage discount. In comparison, for a $10 item, a 20% discount will look more attractive than a $2 discount, although they are basically the same thing.