


The benefits of quality photos
Your product images are one of the most important things buyers use to decide whether to make an online purchase. Great photos can help you:
- Increase sales
- Reduce questions and returns
- Get higher in search results to get found through eBay and external search engines

eBay’s photo requirements
1. Every listing must have at least one photo
If your item cannot be photographed: For example, you are selling a travel package or repair services, find pictures on the Internet that can illustrate your offer. Please note: Some pictures may be protected by copyright.
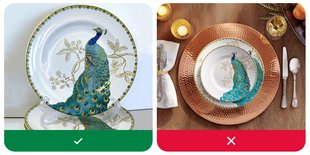
2. Show exactly what you are offering to buy
The following are not allowed:
- Photos that don't accurately represent the item
- Placeholder images used to convey messages
- Stock photos for pre-owned items
Catalog images are acceptable, but not as the primary photo for pre-owned items except those in the Books, Movies, Music, or Video Game categories.
3. Meet the minimum photo size
Small photos get blurry or pixelated when they’re enlarged. eBay requires a minimum of 500 pixels for an image’s longest side. Most cameras and camera phones will exceed this minimum, and bigger is better! To optimize the image for different sizes of screens, try to make it 800-1,600 pixels on the long side. eBay’s photo uploader can take images up to 7MB each.
4. Don’t use borders
Photos with added borders are not allowed, unless the border is a natural part of the photo, for example; when you take pictures of a square or rectangular item against a neutral backdrop.
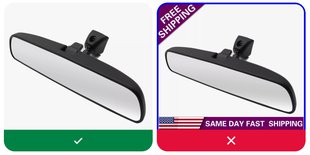
5. Don’t add text or artwork
No text, artwork or marketing material, like “Free Shipping” or seller logos, may be added to photos. Use the title, subtitle, and description box to include details of your item to help place higher in search results.
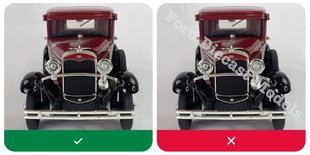
6. Don’t use photos with watermarks
Watermarks of any type, including those used for ownership attributions are not allowed.
Top tips for taking great photos
The more clear, crisp, quality pictures you show, the easier it is for buyers to find your listings and make purchase decisions. Check out these tips and tricks for taking better pictures and then take a lot of them.
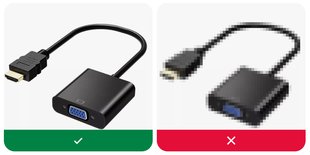
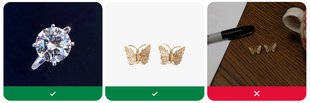
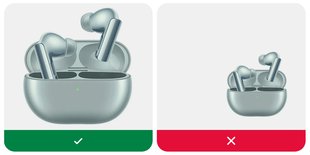
1. Use a plain, uncluttered backdrop to make your item stand out
In order to draw attention to your item — and not your item’s surroundings — set up your item against a plain white or neutral backdrop. A white poster board clipped to a stand and bent to form a backdrop or large Whatman paper sheet work well. However, for reflective, shiny items like bright jewelry a dark backdrop may be better.
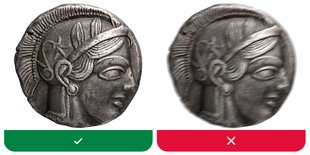
2. Turn off the flash and use soft, diffused lighting to prevent shadows
Shadows, reflections, hot spots, and greyness will make your pictures less attractive. Whenever possible, avoid using a flash, use more than one source of diffused lighting.
There are several ways to create diffused lighting:
- Place a pure white screen, a sheet, gauze, frosted glass, etc. in front of the light source
- Shine the light away from the item and bounce it off the ceiling or wall
- Create or buy a lightbox that illuminates your item evenly
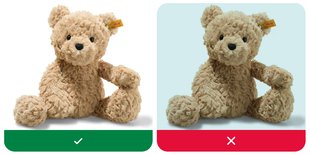
3. Set your camera’s AWB setting to “auto” to get the most realistic color in your photos
One more thing about the lighting is the tinting of the photo. Different kinds of light give photos different colors. Incandescent bulbs give photos a yellow tint; fluorescent bulbs make them appear blue. Typically, digital cameras have a setting called Auto White Balance (AWB) that compensates for these differences, creating a neutral or daylight photo.
4. Use a tripod to keep your photos from being fuzzy
Unsteady hands can spoil any picture. A tripod helps keep the camera steady to get clear, sharp photos. If you don’t have a tripod, set the camera on a flat surface and use the shutter timer.
5. Compose your shot correctly
Place the item in the middle of the image, making sure it fits in at least one photo as a whole. Don't leave lots of open space around the item in the photo. The item should take up 80-90% of the frame.
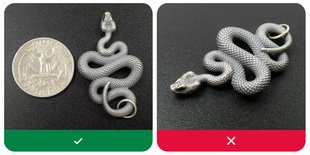
6. Show the scale
Let the buyer understand the actual size of the item. If the size of your item isn’t clear, place a coin or ruler next to the item to indicate its size — and take another picture.
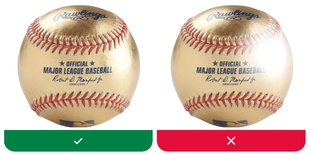
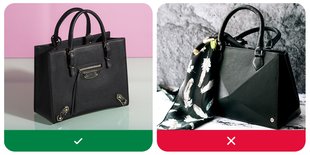
7. Avoid using props
We do not recommend using additional props when taking pictures: It can obscure, shade or otherwise change the image of the item. Props may confuse buyers about exactly what’s included in your listing.
8. Capture all details
Take lots of detailed, close-up pictures from different angles: Capture images of the top, bottom, and sides of your item. Use macro mode to take photos of important details.
If your item has flaws, include photos that show them clearly. You can always include important details about your item in the Item Description area of your listing. If needed, clean your item.

9. Create proper file names
Name your files so that they reflect the subject matter and other important details. Include numbering in the file name — it will also help ensure you upload pictures in the order you want them to appear in the listing. For example:
- Nike_Phantom_Womens_White_01_pair.jpg
- Nike_Phantom_Womens_White_02_side.jpg
- Nike_Phantom_Womens_White_03_top.jpg
- Nike_Phantom_Womens_White_04_toe.jpg
- Nike_Phantom_Womens_White_05_sole.jpg
10. Get a professional look with your mobile phone
The rules above are applied to pictures taken with the phone camera. In addition, we recommend:
- Keep the lens clean
- Make sure your phone’s camera is set to the highest resolution
- Turn off the flash
- Keep it steady
- Use the camera’s autofocus when possible
- Consider third-party camera apps
Learn more on how to make your listings more mobile-friendly
11. Do your best when selling fashion
High-quality photographs are especially important when presenting clothing and other fashion products. Follow these tips to get a professional look when photographing apparel:

How to add and manage photos in your listings
To add pictures to listings, use the photo uploader (sometimes also called the eBay picture manager) in eBay listing forms.
Uploading photos in your listing
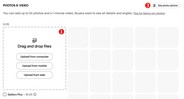
In your listing form, find the Photos & Video section. Then you can (1):
- Drag and drop files from your computer
- Use the button Upload from computer and browse to find the photos you want
- Select Upload from mobile to add images from your mobile device
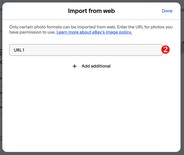
- Use the button Upload from web and enter the URL where your photo is located (2). You can add more than one by selecting + Add additional
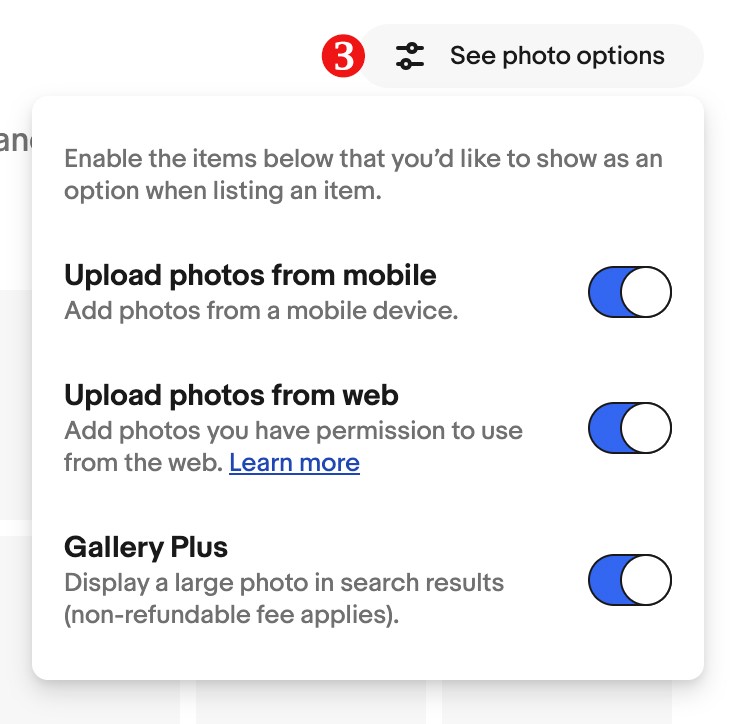
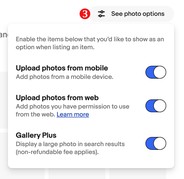
See photo options (3) to enable or disable the items that you’d like to show as an option when listing an item.


The first picture you add, called the gallery photo, appears next to your item’s title in search results and is the main photo (1) in your listing. Once images are uploaded, you can rearrange the order to make another image the main one, or remove (2) one, several or all photos. Tick the Gallery Plus checkbox (3) if you want to enable this option.
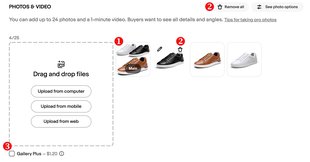
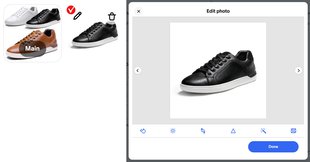
By clicking the pencil icon on any of the images, you can use the built-in editor to enhance them. Crop, rotate, sharpen, adjust the brightness and contrast, or remove the background of the photo using the icons in the uploader preview, then select Done.

Managing and replacing photos
You can adjust or replace photos by going to Revise your item from either My eBay or Seller Hub.
- To delete or replace an uploaded photo: Delete the existing photo, and upload a new one if needed
- To replace a photo copied from a web address: Use a new URL for the replacement photo
- Change a gallery photo: Find the photo you want to use as the gallery photo, and move it to the top left position. You can change gallery photos for auction listings if there are no bids and more than 12 hours left in the auction
Problems when adding photos
If you're having trouble adding photos, make sure:
- You're using one of the accepted file formats (JPEG, PNG, GIF, TIFF, BMP, WEBP, HEIC, or AVIF)
- Each file size is no larger than 7MB each. If you're copying from a web address, the photo can be 12MB
Other tips that might help:
- Use the latest version of the Chrome, Firefox, Internet Explorer, or Safari web browsers
- Clear your browser's cache (refer to the browser’s help section if you don’t know how)
- If you’re using pop-up blocking software on your browser, the photo uploader might not appear. Try temporarily disabling pop-up blockers (refer to the browser’s help for instructions)
- Make sure your image hasn't expired or been archived. eBay stores pictures for 90 days
Please note, the screenshots used above are taken from www.ebay.com. Hence, the nomenclature or terminology may differ on other eBay websites.